How to use a Ceiling Dehumidifier ?
The use of a ceiling dehumidifier isn’t that much complicated. It is just that you must know the proper techniques to attain maximum benefit. The complete effectiveness of the dehumidifier depends on its proper installation, usage, and handling. Let us take you through a step-by-step guide to make it feasible to understand.

Key Steps For Installation
If you have got a ceiling dehumidifier for basement or a crawl space, following are the key steps you must follow for its proper installation.
Voltage And Circuit Arrangements
Prior to installing the dehumidifier, you must not forego testing your voltage. If the voltage is unstable and fluctuates frequently, it may lead to the dehumidifier’s inefficient working and damage it in the long run. You need to check the power, it must be in accordance with that mentioned on the nameplate voltage of the dehumidifier.
Usually, an industrial dehumidifier’s voltage ratings and requirements differ in different countries. We have ceiling dehumidifiers that are 110V, 220-240V, 380-415V, etc., and 50Hz and 60Hz. Customers can select from various given voltages to accommodate their working space.
Moreover, always check the voltage ratings given by the manufacturer. Also, ensure the circuit is smooth with no unnecessary extensions and proper surge-protection devices.
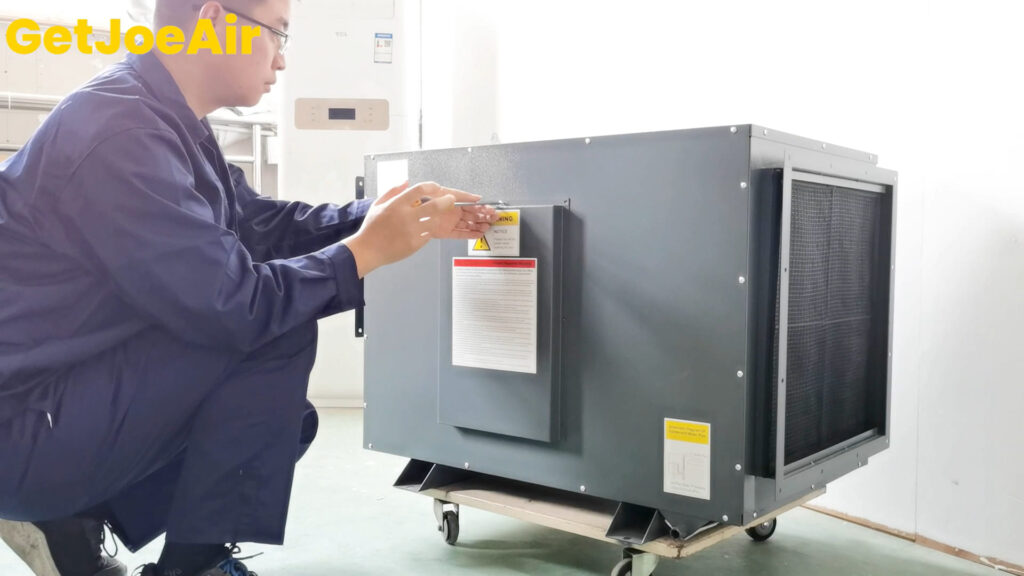
Machine Installation
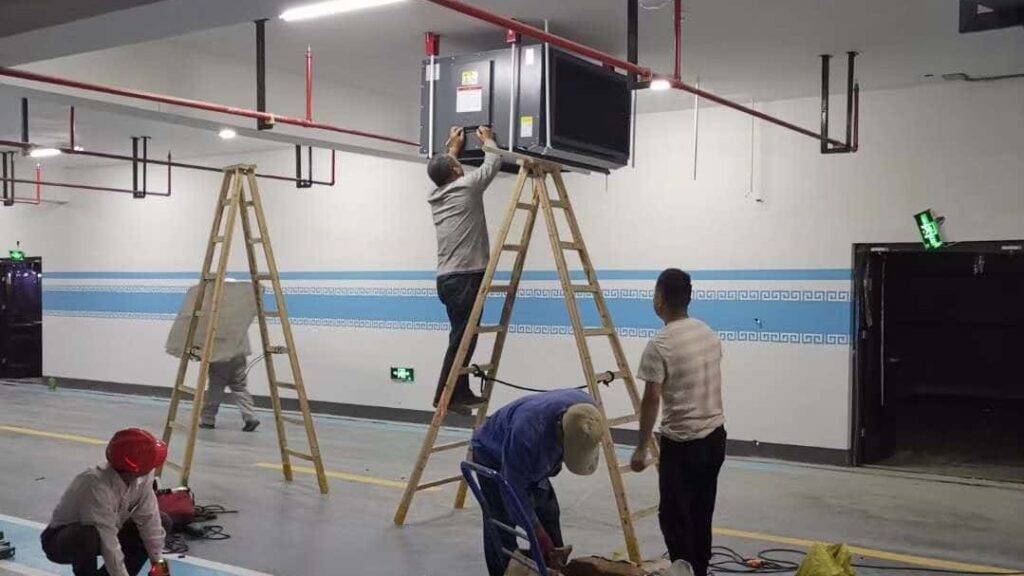
Specific criteria need to be followed for the installation of the dehumidifier. The ceiling dehumidifier must be installed near the air duct in your workplace and warehouses. The dehumidifier comes with four booms and necessary nuts and screws needed for the installment.
A hole is drilled into the ceiling, and the expansion bolts and derrick are fixed. You can adjust the lifting height according to your needs. Be extra cautious to lift the dehumidifier horizontally.
Here is a complete guide of How to install the ceiling dehumidifier?
Wiring
A flawless wiring and circuit breaker are unavoidable for the efficient working of the dehumidifier. The wiring from the main panel to the dehumidifier has to be run along a safe route and properly stapled. The 3-phase ceiling dehumidifier has three live wires, one ground wire, and one neutral wire. Make sure to check and recheck its proper connection and current flow.
Drainage Setup
The dehumidifier’s moisture from the air is condensed into water and then let into the water tank for disposal. The water from the water tank is disposed of to any sink or drainage hole via a water hose, which is generally provided with the dehumidifier.
In order to maintain the dehumidifier working, the drainage system should be proper and smooth. Be cautious not to unnecessarily bend the drainage pipe as it may cause hindrances in proper drainage.
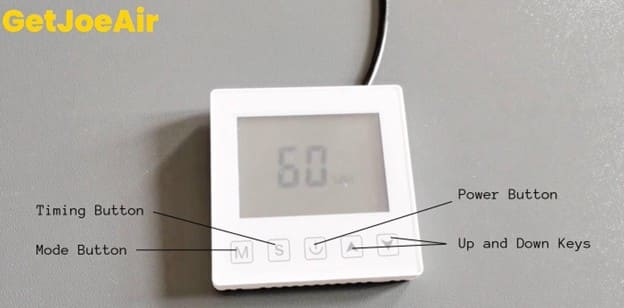
Control Panel/Switch Button Settings
On/Off Button
The power button will be pressed to turn the machine on or off. When the machine is on, the bright LED display shows the room’s humidity level. The machine also indicates the onset of operation once the compressor starts working.
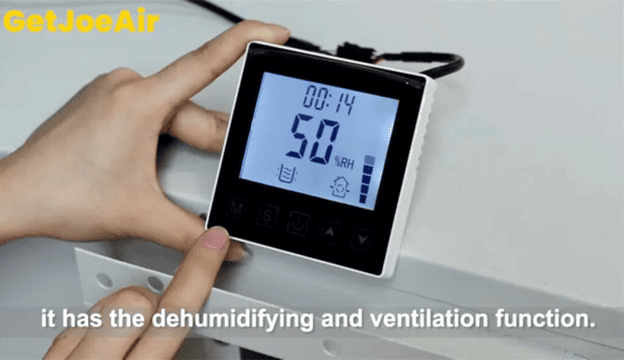
Mode Button
The dehumidifier is equipped with a mode button so as to switch between the dehumidifying and ventilation modes. The screen will show the symbols assigned to them respectively.
Add Key
The add key is used to increase the percentage of relative humidity. Each time you press the add button, 1% RH is added. You can hold the button to continue adding to the value. Stop when you reach your desired level, and the screen will blink 4 times, indicating the setting to be applied.
Minus Button
Same as the add button, the minus button acts oppositely. The minus button decreases by 1% RH level with every press. Hold the button to continue decreasing the level until you reach the desired level.
Timing Button
To set the working time, press the timer button. Once the screen shows ‘ON,’ use the minus or the add button to increase or decrease the timing. One hour is added or subtracted every time you press the plus or minus button.
Wait for the screen to flash continuously to indicate the onset of the timer, and then press the timer button again to exit the timer mode. The dehumidifier will shut down automatically once the set time ends.
Power On
The dehumidifiers work in two modes per your facilitation: dehumidification and ventilation. In the dehumidification mode, which is also the primary mode of the dehumidifier, the dehumidifier works to remove the excess dampness from the air before sending it back.
In the ventilation mode, the dehumidifier works on the fresh air circulation without any dehumidification process. It works more like a fan, regulating airflow in congested or basement spaces.
Monitor Regularly
Once the dehumidifier is installed, you must conduct a test run to ensure it works smoothly. Not only that, the dehumidifier must be monitored regularly. Any choking or blockage in the filters, coils, or drainage line must be promptly and timely addressed. The wiring and power supply should be checked at least quarterly. Any unusual noise or water leak demands to be checked by a professional.
Important Considerations To Be Followed
Airflow
The factor of proper ventilation and airflow must not be ignored. The dehumidifiers must be installed with adequate space for ventilation in view. The dehumidifiers Draw damp air from the space and release it back after removing moisture. They need proper placement and ventilation to continue working efficiently. Any clogged filter, vents, or placement in corners with no space around them may minimize their functioning.
Room Closure
All the entrances and doors must be closed while your dehumidifier operates. It prevents the humid air from entering the space. In turn, your dehumidifier will yield better results in maintaining the relative humidity level in a shorter time. The frequent opening and closing of doors may cause the dehumidifier to work excessively and prolongedly in maintaining the humidity level.
Cleaning
A proper cleaning regimen is unavoidable if you want your ceiling dehumidifier to work at its maximum potential. The filters must be cleaned regularly. The grill of the dehumidifier must be cleaned at least once a month, as any dust or impurities on it may interrupt the smooth airflow. The coils should be wiped with a damp cloth. The water tank needs to be cleaned and disinfected; otherwise, it will become a breeding ground for bacteria and mold.
Maintenance
It is crucial to maintain the ceiling dehumidifier to let it work properly and smoothly.
The dehumidifier must not be run without a filter. A separate filter is also given. Prefer the model of the dehumidifier that is equipped with washable filters. It must be made sure that the filter is free from dust and is cleaned and replaced regularly, at least twice a month. The water tank must be emptied on time and appropriately cleaned.
If you find cleaning and maintaining the dehumidifier difficult as it is mounted on the ceiling, you can hire a professional to help carry out the proper service and maintenance; if not monthly, then an annual inspection and professional maintenance are recommended.
Final Thoughts
Apart from maintenance, selecting the right brand of dehumidifier from a reliable manufacturer is an additional perk to ensure the maximum working time of your dehumidifier. Indeed, this detailed guide covers all the essential information regarding installing and handling the dehumidifier. Our experts are just a click away if you need to discuss any specific concern.